
Detroit Diesel Regen Tutorial — Step-by-Step Guide
Share
If your Detroit Diesel engine is showing a DPF light, or you're experiencing power loss and high soot levels, it’s likely time for a forced regeneration. Regens are critical for clearing soot from the Diesel Particulate Filter (DPF), maintaining performance, and preventing derate conditions.
With a NoFeeDiesel diagnostic laptop and RP1210 adapter, you can perform a safe, complete DPF regen — without dealer access or subscription fees.
What Is a Diesel Regen?
A regeneration (regen) is a process where the exhaust system heats up to burn off accumulated soot particles trapped in the DPF. There are three types of regen:
-
Passive Regen – Happens during highway driving
-
Active Regen – Triggered automatically by the ECM
-
Forced Regen – Manually started using diagnostic tools when soot levels are too high
If the first two types fail or are interrupted, a forced regen is required to avoid serious damage or limp mode.
Step-by-Step: How to Perform a Forced Regen on Detroit Diesel Engines
1. Connect Your Diagnostic Setup
-
Plug your RP1210-compliant adapter (like Nexiq USB-Link) into the truck’s 9-pin diagnostic port
-
Connect it to your NoFeeDiesel diagnostic laptop via USB
-
Confirm all adapter lights are active
2. Launch Your Diagnostic Software
-
Open the preloaded diagnostic program
-
Wait for ECM and module detection
-
Confirm the vehicle’s VIN and engine model are correct
3. Scan for Fault Codes
-
Navigate to the fault code section
-
Read all active and inactive codes
-
Clear inactive codes and address any active ones that would block regen (e.g., sensor or DEF-related faults)
4. Initiate the Regen
-
Navigate to the Aftertreatment or DPF Regeneration section
-
Choose “Manual Regeneration” or “Forced Regen”
-
Follow the on-screen instructions
Make sure the truck is:
Parked
In neutral
With the parking brake set
At operating temperature (if required)
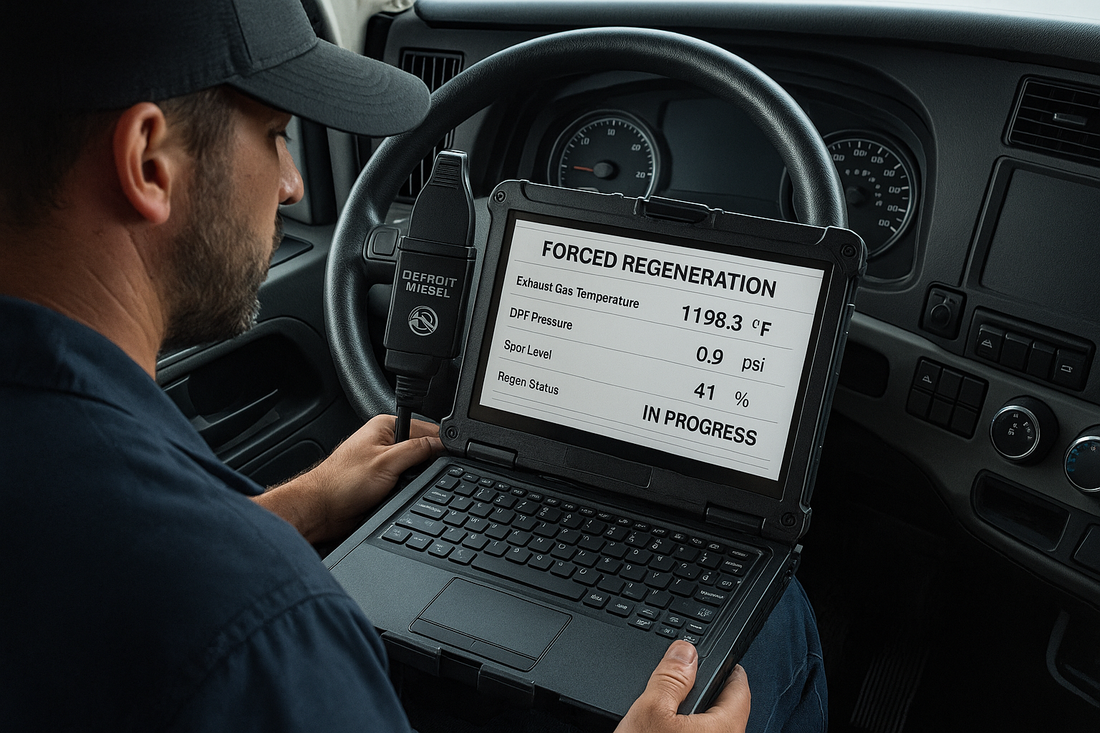
5. Monitor the Regen Process
As the regen begins, monitor key metrics like:
-
Exhaust gas temperatures (inlet, mid, and outlet)
-
DPF pressure differential
-
Soot load % or grams
The regen will typically take 20–45 minutes, depending on soot level and system condition.
6. Complete and Confirm
-
Once the regen finishes, your software will display a confirmation message
-
You may see a reduction in soot percentage and DPF pressure
-
Clear any codes generated during regen if applicable
Post-Regen Inspection Checklist
-
Verify DPF backpressure is within normal range
-
Confirm that soot level has reset or dropped significantly
-
Check that temperatures returned to normal
-
Run a test drive or idle check, if needed
Common Reasons for Needing a Forced Regen
-
Too many short trips or idle time
-
Passive and active regens failing to complete
-
High soot buildup triggering DPF full warning
-
Fault codes or sensor issues interrupting regen logic
-
Preventative maintenance during scheduled service
What You Need:
-
Rugged NoFeeDiesel laptop with preloaded software
-
RP1210 adapter (Nexiq, DG Tech, etc.)
-
No software subscriptions or cloud activation
-
Full support and 30-day guarantee